
Teachable and Kajabi are two robust platforms when it comes to hosting online courses.
But choosing the best from two can be demanding especially if you’re a newbie to course creation.
Hence you’re stuck with making a choice for the fear of choosing one that won’t suit your course creation needs.
Also, you may have read reviews telling you that both platforms are good. But still not convinced which is best for you.
Hey, you don’t have to worry. You’re in the right place as this piece is meant to help you make the best choice base on your needs by comparing Teachable Vs Kajabi.
This comparison will cover the following:
- Course creation
- Student’s learning experience
- Membership site
- Design, Template, and Customization
- Affiliate marketing
- Email marketing
- Funnels
- Integration
- Transaction fee & Payment methods
- Pricing plans
- Customer support
Let’s get started.
What’s Teachable?
Teachable is one of the popular online course platforms on which online entrepreneurs create online courses and coaching programs.
Created in 2013 and now boasts of 100,000+ instructors who impact knowledge in others through their courses.
It’s an all in one platform that gives you all the tools you need to create and sell your courses easily.
What about Kajabi?
Kajabi is also an all in one platform on which creators can create and sell their online courses, membership sites, and other digital products.
Since 2010 when it came on board, it has empowered 50,000+ course creators to impact knowledge and skills into 60 million students across 120 countries of the world.
Its features are smart and suitable to create and market your digital products.
Let’s start comparing.
1. Teachable Vs Kajabi: Course creation
Creation of course is a crucial factor to look out for in Teachable and Kajabi. After all, that’s the main reason one needs either of them.
For a beginner who hasn’t laid his hand on any online course hosting platform, Teachable will be a better option.
While Kajabi which is a little bit complex because of its advanced features is suitable for those who have experience in the field.
Teachable doesn’t have a learning curve when it comes to course creation. This’s because its tools are easy to use.
It’s straightforward that you don’t have to bother getting confused with the process.
Here’s how to create a course on Teachable:
After you have signed up for Teachable, on your admin tab, click on the Course tab. You’ll see it at the admin sidebar.
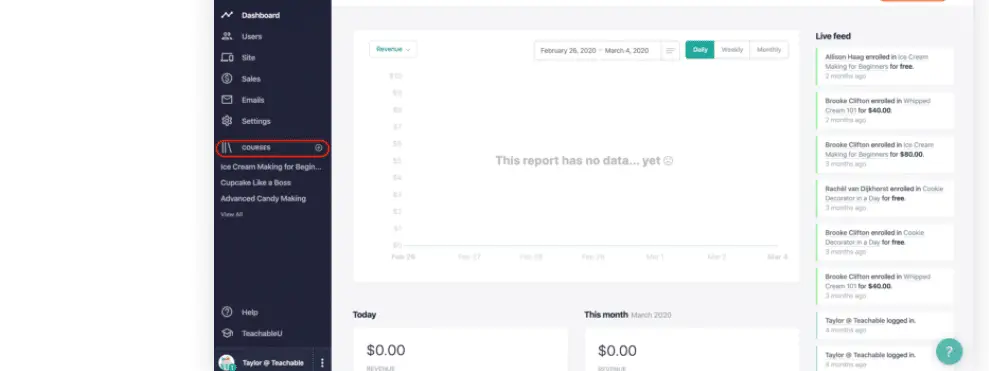
Click on new course. You will be taken to a window where you can add your Course title, Course subtitle. Then use the drop-down menu to select the course author.
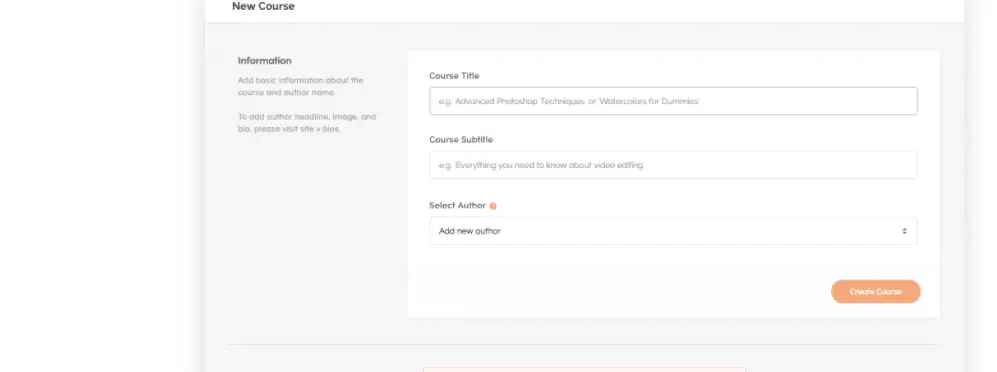
Click on create course after you have entered all the Course information.
Next is your Course details which contain the following:
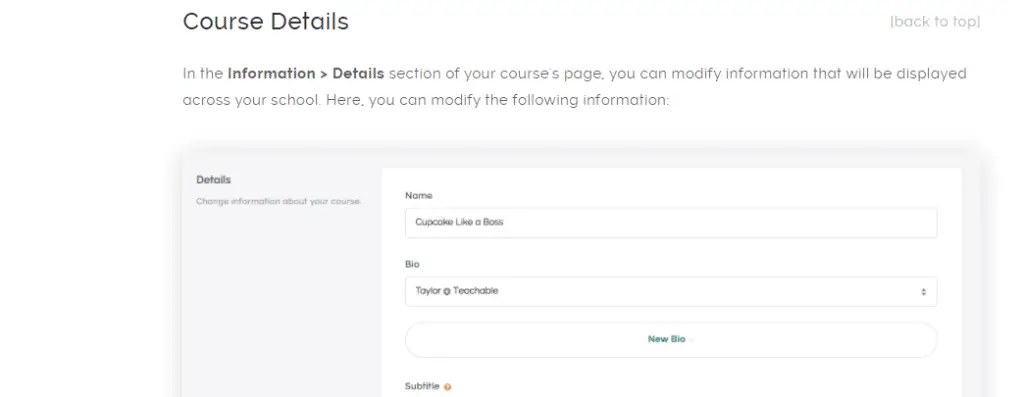
Name: Which is the title of your course as seen in your Teachable school.
Bio: This is about the course creator. It will appear in the drop-down menu if you’ve already added it to your school.
Subtitle: Used to show extra information about the content of the course.
Categories: The course must be placed in a category so as to make it easy for students to locate it.
Creation of your online course on Kajabi comes with a lot of customization. To a beginner who isn’t tech-savvy, it could be difficult.
But for experience course creators, Kajabi’s features are awesome when it comes to creating online courses and coaching programs.
Below is how creating a course on Kajabi looks like:
Once you sign in to your account, you will be taken to your dashboard.
On the left-hand side of your dashboard, you will see “ Products“. Tap on it.
A new window opens where you can select from the options there which include: Mini course, online course, membership, etc.
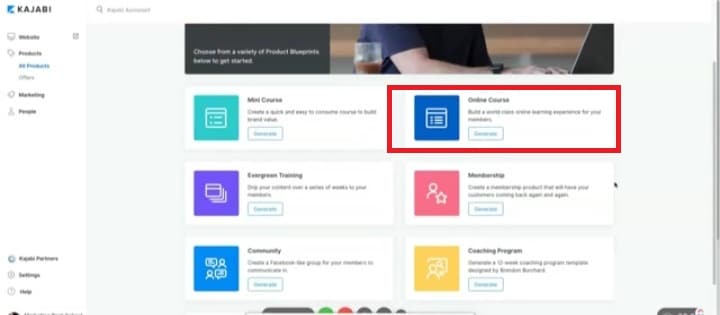
Click on new course and a window appears where you will name your course.
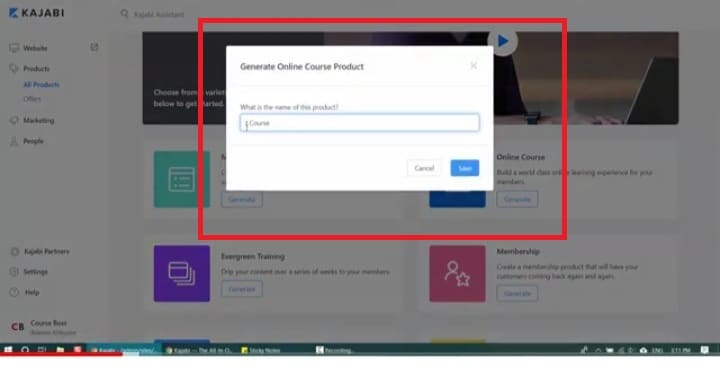
After naming your course, click save and you will be taken to another window where you will customize your course.
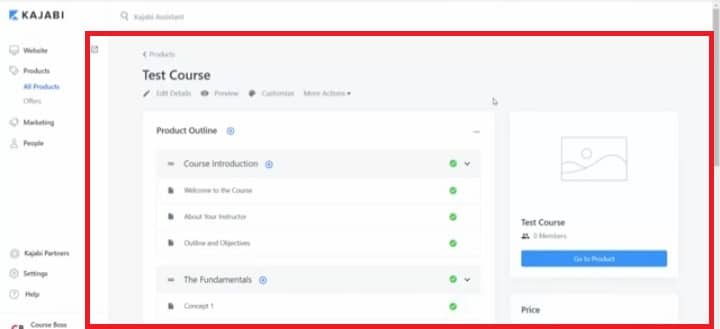
Here you follow the guidelines to create your course introduction, author’s bio, course outline, and objectives. You’ll also upload your course resources which maybe videos, audio, images, PDFs, and text files.
Lastly, check to see that you’ve filled in all the necessary information.
Then click on publish on the right side of your dashboard and hit save.
Congrats. Your first course on Kajabi is live for your target audience to check out.
Verdict: Teachable looks easier when it comes to course creation. It’s simple and straightforward.
But Kajabi’s course creation is a bit complex due to more customizations though it has awesome features. To a beginner to course creation, it could be tasking.
2. Student learning experience
As a course creator, the learning experience of your students should matter to you. That’s one of the ways to have them derive value from your course and also meet its objectives.
Teachable school has an attractive visual to start with. It also offers some customization options to make changes.
As an instructor, you’ve the flexibility to use the lecture editor to add files, quizzes, and text to lectures to create the best experience for your students.
There’s no limit to the number of students that can participate in a course. Your students can go mobile because Teachable has a mobile app for iPhone users. This will enable them to learn while on the go.
But one downside of Teachable is that you can’t create your course in other languages. This means that some international students who don’t speak English will be shot out.
Student’s learning experience with Kajabi is more advanced.
Apart from numerous customization options, it offers a great learning experience for students.
For example, students have access to your blog, website, assignments, and other tools that will enhance their learning experience.
However, the number of students you instruct on Kajabi is based on the plan you subscribed to. For the Basic plan, it’s 1000 active students and 3 courses.
Growth plan supports 15 courses and 10,000 active students while for Pro plan, it’s 100,000 active students and 100 courses.
Students on Kajabi can go mobile because it has Android and iOs apps.
Verdict: Kajabi has a slight edge over Teachable despite their downsides. Its ability to offer apps for Android and iPhone is a plus.
This’ll allow many students to go mobile while learning since Android users are more in number globally than iPhone users which Teachable’s mobile app supports only.
3. Membership site
Your exclusive content, idea, advice, and tips can make you money online when you create a membership site.
It simply means giving your audience access to your content either free or paid.
Do Teachable and Kajabi support membership site? That’s what we will see next.
In Teachable, creating your membership site is through a course bundle and subscription.
You need to create a course bundle and subscription price for each of the membership plans.
To get started, log in to your Teachable school.
Select course from the admin sidebar.
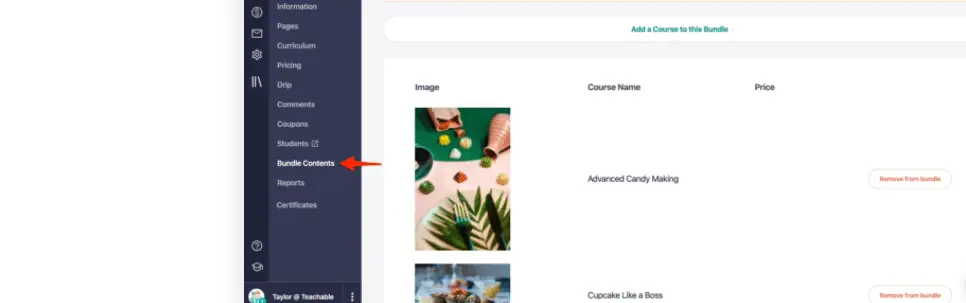
On the course you want to function as a membership bundle, click on bundle content.
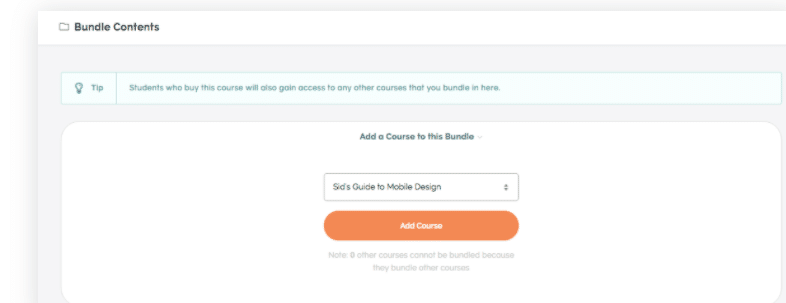
Add the course you want to use as the membership bundle.
Next is to locate pricing for each of the courses.
Tap a new pricing plan to add a price for the bundle.
Finally set your subscription to be a monthly or annual payment. It’s up to you.
Then click Add pricing.
Creating a membership site on Kajabi is also easy.
Once you’re on your dashboard, click on products and you will see different options of which one of them is to create a membership.
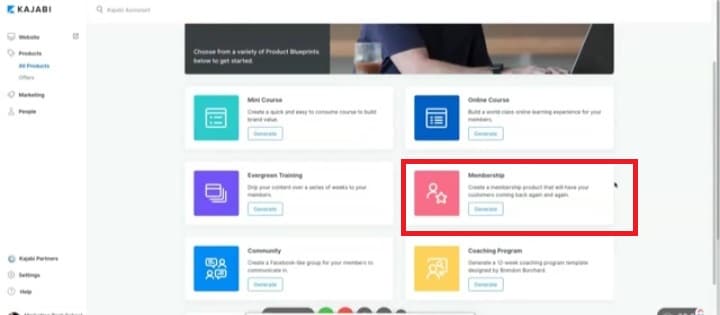
Click on membership and a window will appear where you’ll name your product to generate a membership.
Once that is done, you can customize your membership as you want.
Verdict: Kajabi and Teachable support the creation of a membership site. Their features are similar and they offer great customization options.
4. Design, Template, and Customization
Designs, templates, and customizations are crucial in creating online courses and membership sites that will attract an audience.
What attracts people first is what they see.
You may have great content to deliver, but if the design and template of your digital products look poor, it’s a turn off to your audience.
That’s why we need to look at the designs, customizations, and templates of Kajabi and Teachable.
Teachable’s power editor is powerful when it comes to making changes on your website. You can customize themes, create pages, and even change the custom text with the power editor.
However, this requires you to have a little knowledge of coding. When it comes to course creation, it offers a good design.
You can customize the layout and design of your course. Also the thank you and the sales page are editable.
Kajabi boasts of an intuitive landing page builder. Its customizable landing pages make it easier to create landing pages with a click.
Plus its design is flexible making it possible to adjust your pages to achieve that perfect outlook.
As an all in one platform, you can connect your landing page with emails, special offers, and automated marketing campaign.
Building your website is easy with already made themes that are customizable. After which you integrate it into the website builder.
When it comes to course creation and membership sites, it’s still about customization. You edit and customize default settings to accommodate your content.
Verdict: I give it to Kajabi. It has a strong edge in design and customization.
Teachable boasts of a power editor but it is more useful if you have little knowledge of coding.
Kajabi has an intuitive page builder, page creator, plenty of themes and templates. This makes it easy to create landing pages, and change aspects of your website all through customization.
5. Affiliate marketing
To earn more revenue from your online course and other digital products, you need to work with affiliates who will help you promote them and in turn earn a commission.
Kajabi and Teachable have affiliate programs for course creators but let’s see what they look like.
When you log into your Teachable dashboard, under User, you see Affiliate. Click on it to add Affiliates users.

Teachable affiliate program has options on your dashboard to set the following:
Cookie duration: If a user makes a purchase using a link within the cookie duration, the affiliate earns a commission.
Commission rate: The amount in percentage an affiliate earns for a sale of a product.
When an affiliate signs up to promote your digital product, he can log into his affiliate portal to generate affiliate link and also see his dashboard.
Kajabi’s affiliate program isn’t like Teachable. You provide your affiliates the registration and sign-up link.
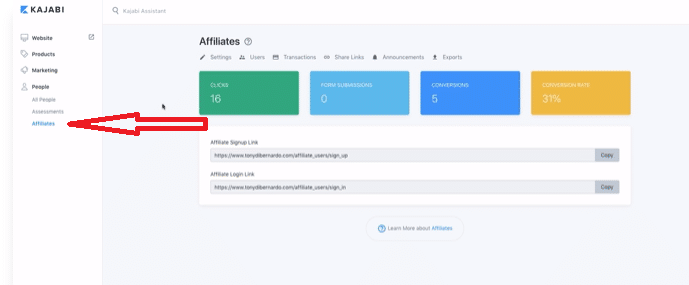
When they sign up, they can access their affiliate portal and begin to promote your product. As the course creator, you double as the affiliate manager.
You can monitor the account of your affiliates and the sales they have made. The cookie duration on Kajabi is 30 days.
This means that an affiliate can earn a commission if a user makes a purchase within 30 days of clicking on the affiliate link.
This’s not the same with Teachable that allows you to set the cookie duration yourself.
Verdict: Both have their ups and downs here. Kajabi has a more robust affiliate program but it doesn’t allow course creators to set cookie duration.
Teachable doesn’t have a robust affiliate program but it allows you to set the cookie duration yourself between 1and 365 days.
6. Email marketing
Email marketing is one of the marketing strategies you can use to capture the target audience for your online course and membership site.
It’s also a means of building a relationship with your students.
Teachable has an email marketing service integrated into your account. When you log into your dashboard, head over to email. Click on email.