
Blog traffic is a key aspect of blogging. Every blogger wants to check their Google Analytics and see the amount of traffic they have acquired on their blog over a period of time.
This’s crucial because without traffic you won’t make money from your blog. There are many ways to drive traffic to your blog.
Pinterest is one of them. That’s why it is important you learn how to use Pinterest to drive traffic to your blog.
You may have tried other means of driving traffic to your blog for free like Google. The truth is that Google traffic is competitive and takes time. And you’ve to do extraordinary to outrank your competitors.
That’s where Pinterest has an advantage over it. With Pinterest, your chance of driving traffic to your blog is higher as a beginner. The competition isn’t intense like Google.
With that being said, I welcome you to this ultimate guide where you’ll learn how to use Pinterest to drive traffic to your blog.
The aim is to help you increase your monthly traffic which is important to you making money from your blog.
This step-by-step guide is what I use to drive to my blog using Pinterest and I’ll show you how I do it.
This beginner’s guide will cover the following practical steps:
- How to create a Pinterest Business account
- Create a Pinterest board
- Design your pin
- Create a Pinterest pin
- Save to your board
- Scale your Pinterest traffic
- Automate your Pinterest traffic
But before we go into details of the outline stated above, let’s look at what Pinterest is and how it works.
What is Pinterest?
Pinterest is a visual search engine that internet users use to find out about an idea that is in form of a pin.
Ben Silbermann, Evan Sharp, and Paul Sciarra founded this visual platform in 2010 to help users identify ideas that will inspire them to learn something new, do things on their own.
How does Pinterest work?
Pinterest works simply this way:
Digital marketers or business owners create accounts and upload pins that represent written articles, infographics, audios, and videos.
Searchers who also have a Pinterest account search for them to discover pins that are of interest to them.
Key terms in Pinterest
Profile: Here you find your pins, board, overview, activities, followers, and following. Anyone can see your profile but the boards which you created secretly can only be seen by you.
Home feed: This’s where you find pins, brands, and people base on your recent activity. You’ll also see the pins, boards, and topics related to people you follow on Pinterest.
Pins: Pins are visuals that people can save when they see an idea they love. Clicking on it will land you on a website where you read an article or watch a video. If the article or video was helpful, you can decide to save it using the red button.
Boards: This’s where the pins you save lives. You can create a board and arrange it according to how you want it. You can also invite other people to collaborate with you on a group board to find more ideas.
With all these being said, let’s go into details on how to use Pinterest to drive traffic to your blog.
Create a Pinterest account
When you start your blog and want to drive traffic using Pinterest, the first thing is to create a Pinterest account. There two types of Pinterest account to create:
- Personal Pinterest account
- Business Pinterest account
Your blog is a business. Therefore you’re meant to create a Pinterest Business account.
To create a Pinterest Business account: Take the following steps:
- Create a personal Pinterest account on Pinterest website.
- Login into it and click on the top right corner to access your menu.
- Click on ‘ Add a Business account’ and tap get started.
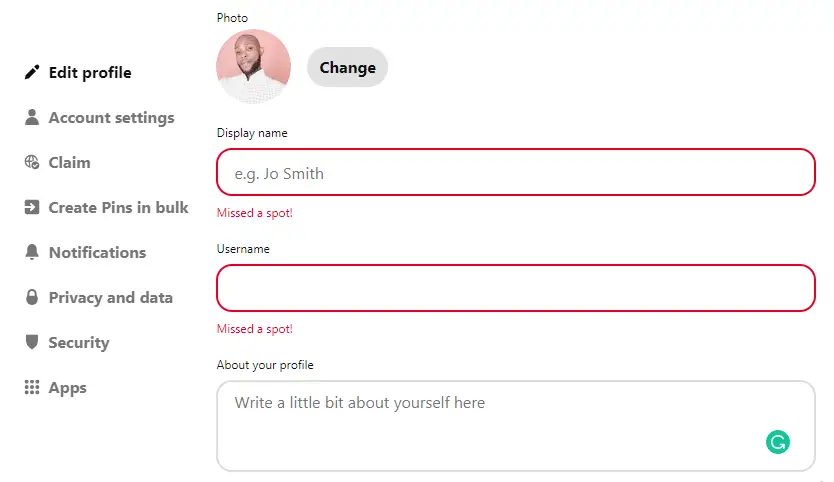
- Add a high-quality profile picture.
- Enter your business name. Note that you need to add a keyword related to your blogging niche so as to optimize your business name for more visibility.
- Add the Url of your blog.
- Select your country/ region.
- Choose a language.
- Tap next to select the type of business you’re.
- Select Yes or No if you plan to run an ad campaign on Pinterest. That’s it with the creation of Pinterest Business account.

Create a Pinterest board
A Pinterest board is where your pins are saved. As a blogger who wants to drive traffic using Pinterest, it is necessary you create several Pinterest boards to increase the chances of your pin being seen on search results.
Here is the process to create a Pinterest board:
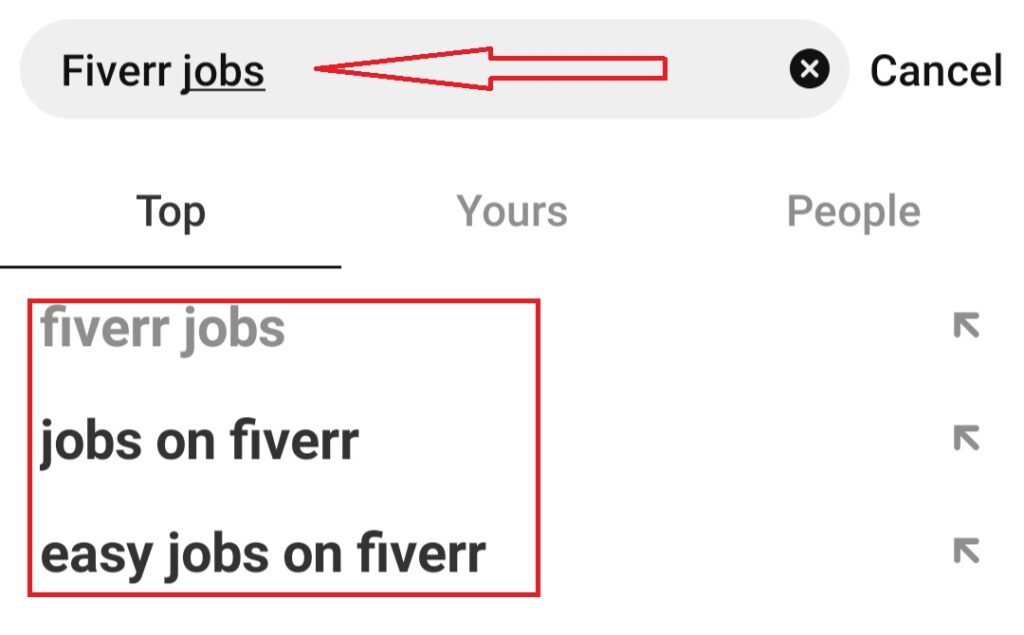
- Search for the keyword you have written about on your blog on Pinterest search bar and take note of the search results. Take a look at the screenshot below.
- After that click on create board on your Pinterest Business account profile.
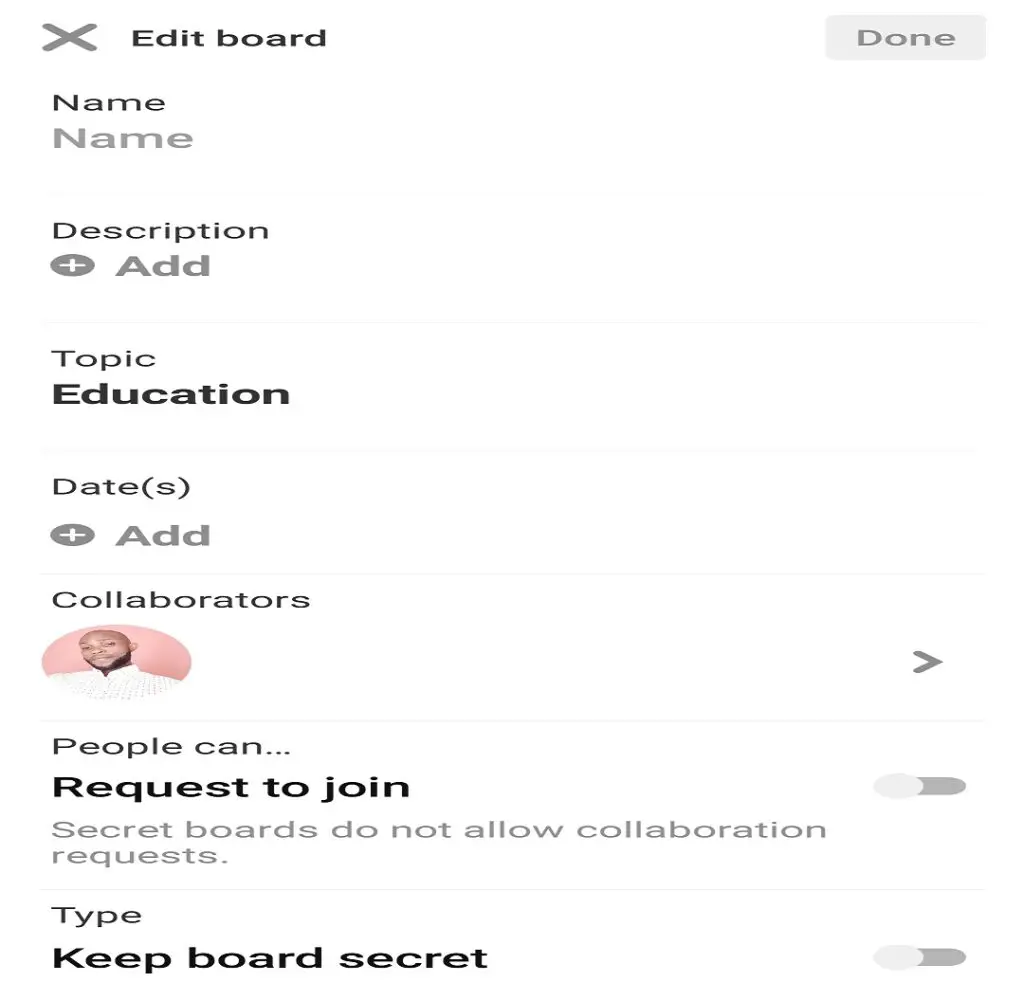
- Name your board. Note that the name of your board should have the keyword you want to drive traffic with. Also, it should be a maximum of 20 characters. Why? Anything above 20 characters will be automatically cut off by the Pinterest algorithm. This will affect the visibility of the pins you saved on that board.
- After naming your board, click on save.
- Go back to the board you just named and click on edit. That’s to allow you to add a description to your board. The description of your board should comprise naturally the first four results Pinterest algorithm returned when you pop your target keyword in the search bar. The aim is to optimize your boards.
- Add the topic you want the board to be on. This will be according to your blogging niche. Also, it is important you choose a suitable topic so that your pins won’t struggle to get recognized by Pinterest algorithm.
- You can decide to add a date and also collaborate with other Pinterest account. It’s up to you.
- Click on save when you’re done.
Create a pin
When you’re done creating your board, the next is to add pins to your board. But before you can add pins to your board, you need to design the pin.
There many tools that you can use to design a pin. I use Canva which is one of the simple and robust graphics design tools. It has a free and premium version.
The premium version offers a lot of advanced features. But as a beginner who is on a low budget, you can make do with the free version pending when you will upgrade to the premium version.
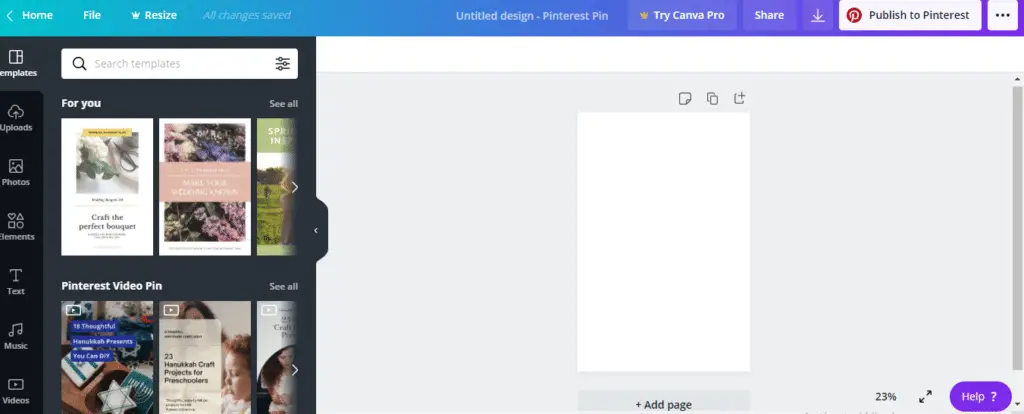
How to design a Pinterest pin with Canva
Designing a Pinterest pin on Canva isn’t hard. It is just a matter of customizing already made templates to suit your needs. By default, Canva already has templates for Pinterest pin which you can edit and use.
But I won’t advise you to do that. Why? You have to be unique to make a difference. A lot of people use already made Pinterest pin templates on Canva to design their pin.
Only to find out that other Pinterest accounts that have already used those designs overshadow their pins.
They complain about not getting traffic from Pinterest. I was guilty of this when I started using Pinterest newly but discovered that it was hurting my traffic.
What did I do?
I changed to designing my own pin from scratch which doesn’t take me more than 10 minutes. I began to see results even by manually pinning.
Below is one of the pins on my Pinterest account

How to design your Pinterest pin from the scratch
Login into Canva from your PC or Smartphone.
- On the search bar type in Pinterest pin and you will see a lot of templates to use which are free. Tap on the designs on after another to delete all of them. Then in your workspace, use the features to design your own pin.
- Set your pin size at 1000x by 1500x. The aim is to ensure that your pin is not cut off on the search bar.
- Next, choose an image that relates to what your blog post is all about. I don’t choose images on Canva. I download free images from Unsplash to create a unique design.
- Use the text feature to create your text on Canva. Your text should be the headline of your blog post. Text formats that are not common on Pinterest are preferable.
- Add the name of your blog at the bottom of your pin with the text feature for identification purposes.
- These are the basics. You can explore the features on Canva to make your Pinterest pin more attractive. Pinterest is all about visuals. Users on the platform are attracted to awesome pins. That’s the way to increase your engagement.
- In the end, save your design on Canva.
Create your pin on your Pinterest business account
At this point your pin design is ready. It is now time to create a Pin on your Pinterest account. To do that, click on create a pin.
You will be taken to a window where you can select the Pinterest pin you designed on Canva.
Give your pin a title which is the headline of your blog post same as the text you added to the pin you designed on Canva.
The reason is to help Pinterest algorithm match the pin’s title, board name, and board description in order for it to easily appear on search results.
Next is to describe your pin. The description of your pin here should have the keyword, common searches that Pinterest algorithm returned when you popped your keyword on Pinterest search bar. Here you’ve to be creative to make it natural and avoid keyword stuffing.
Another key thing to add to your pin description is hashtags. This is because some users perform searches on Pinterest using hashtags.
Your hashtag should be your keyword, blogging niche, and related keywords. For example, if I created a pin on an article I did on how to start a dropshipping business. My hashtag on my pin description can be #Dropshipping #Ecommerce #onlinebusiness
Add your blog post Url.
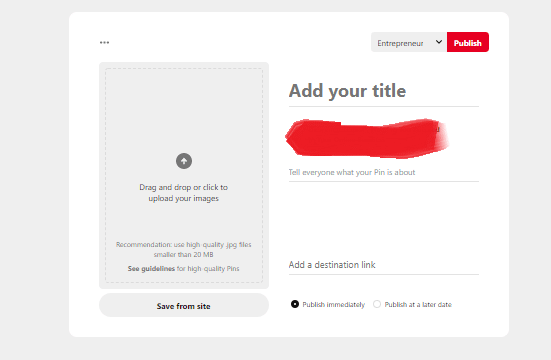
This’s the Url to the blog post which you published on your blog. When users view your pin and are attracted to it, they will click on the Url you added to the pin and it will take them to your blog. Congratulations have driven traffic to your blog using Pinterest.
The final step is to save the pin to the board you have already created for it.
All that I have shown you above are steps on how to use Pinterest to drive traffic to your blog.
But for you to get enough traffic that can boost your blog revenue, you need to scale it. Scaling it in the sense that Pinterest algorithm will increase the impression your pins get which in turn leads to engagement.
How to use Pinterest to drive traffic to your blog – Scaling the process
Create fresh pins consistency
Pinterest favors accounts that create fresh quality pins on a consistent basis. This’s because users on a daily basis search on Pinterest to discover ideas that will inspire them.
Creating fresh pins doesn’t mean you publishing new blog posts daily so that you can create pins for them on Pinterest. No, that’s not the case.
It is simply you coming up with new pin designs with which you can add your previous blog post Url. That way you can increase the chances of driving traffic to your blog using that Url represented on different awesome pins.
Canva is your friend here. You can create as many as possible different Pinterest pin designs on Canva. It requires your creativity to make different pin designs for the same blog post Url.
Make a few changes to your pin title and pin description but don’t deviate from your main keyword. Also, save on the same board.
Repin on different boards
As your Pinterest business account begins to grow, you would have created different boards for different pin ideas. You can repin on different related boards to also increase the chances of your pin being seen on the search results.
But don’t repin more than once on a board. Doing so will send the spamming signal to the Pinterest algorithm. The consequences could be penalizing your account or limiting the impression of your pins.
Join group boards
Joining group boards is something you should try. You collaborate with fellow pinners in your niche to boost the distribution of your pin on search results. As people follow members of the group board, they are likely to see your pins on their feed.
Save pins from other accounts related to your blogging niche
Saving pins from other accounts related to your niche can help grow your followers on Pinterest and give your own pins more visibility on Pinterest search results.
When you save other Pinterest from other accounts on your board, especially viral pins, you indirectly send the signal to Pinterest algorithm that you associate your account with such a pin.
Also when such pins pull up from your board, the chances of your own pins on the board been seen are high. Also, the followers of such Pinterest account from where you saved the pin are likely to follow you since your niches are related.
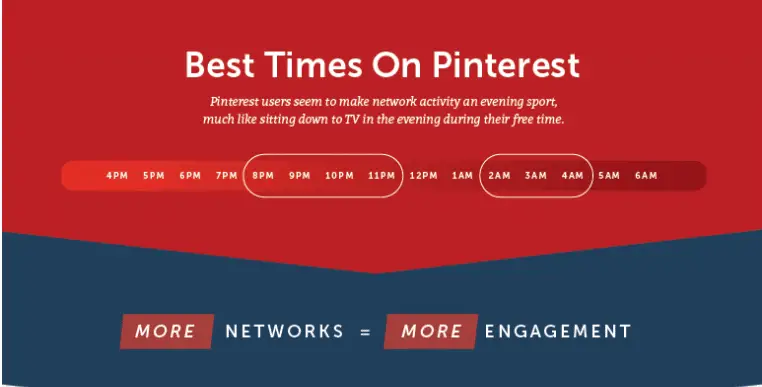
Pin at the appropriate time
The time at which you pin on Pinterest is key. You should target the time when you feel audiences in your niche are active on Pinterest. You also have to factor in the time of your country and the audience you target.
According to curated research from Coschedule, between the hours of 8 – 11 pm are okay with 9 pm being the peak. Also, it stated that Fridays and Saturdays are the best considering that people have time over the weekend and often use Pinterest to plan projects for the coming week.
Claim your blog on your Pinterest business account
Claiming your blog is a vote that your blog is legit and belongs to you. It will allow you to see the analytics of your pins which include; Impression, Audience, and Engagement.
Once that is done, you will see a checkmark below your profile picture and before your blog Url. That will boost the confidence your audiences have in your account which will make them trust your pins.
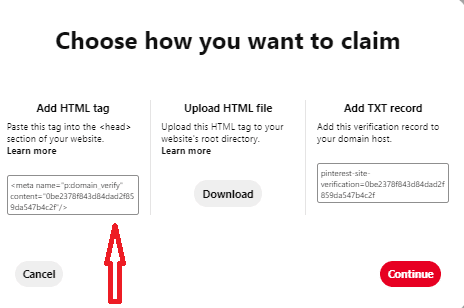
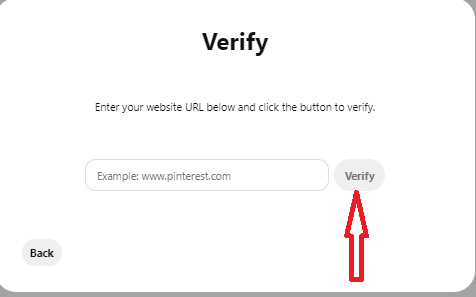
The following are steps to claim your website(blog) on Pinterest:
- Get your computer ready. You can’t claim your website on Pinterest using other devices.
- Login in to your Pinterest business account.
- Tap on the top right corner to access your menu.
- Click on settings
- From the left side, navigation click on Claim
- On the box below you will see Add HTML tag. Copy it.
- Go to the header section of the index.html file of your website and paste the HTML code you have copied.
- Return to your Pinterest business account and enter the Url of your website and click on Verify. That will automatically check for the HTML tag on your website and claim it.
How to use Pinterest to drive traffic to your blog – Automating the process
This ultimate guide on how to use Pinterest to drive traffic to your blog won’t be complete without mentioning the automating process.
Look, pinning manually on Pinterest will drive traffic to your blog but the volume won’t be high.
Because as a human you won’t have that energy and time to pin and repin several times a day which is the standard practice on Pinterest to drive a large volume of traffic.
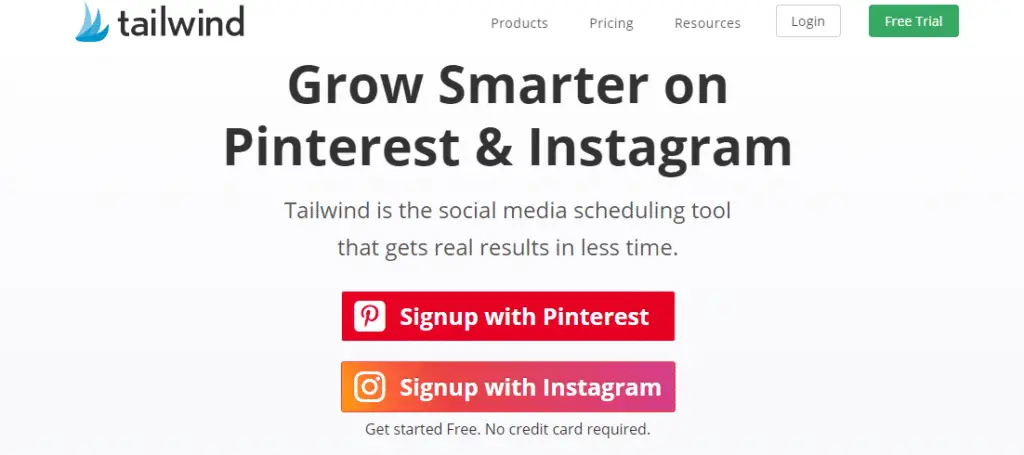
That’s where automating the process comes in. To do this you need a tool called Tailwind.
What is Tailwind?
Tailwind is an automation Pinterest marketing tool that bloggers and small businesses use to drive traffic.
It is a Pinterest scheduler that you can use to drive traffic, generate leads, and conversion on your blog or even on your online store if you plan to start an ecommerce business.
Tailwind has taken away the stress of pinning or repining on your Pinterest account. All it takes is to dedicate some hours to plan your pin and activities on Pinterest using this tool and watch it execute them as planned.
It even has an analytics feature to tell you how the pins you automated performed.
Why do you need Tailwind?
- Schedule your pins.
- Pin at the appropriate time to increase engagement.
- Identify related contents you can share.
- Monitor the conversation about your pin.
- Enhances the reach of your pin.
- Analyze your results.
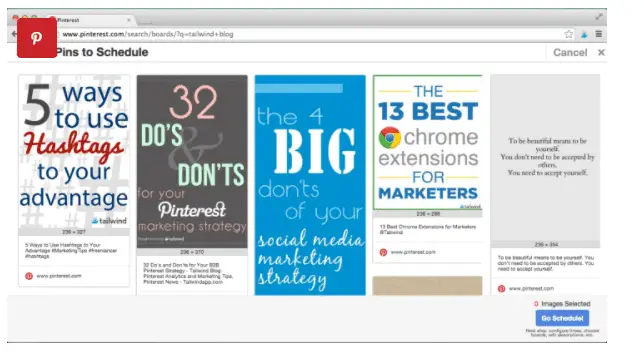
How do you schedule a pin using Tailwind?
You may ask this question if you’re new to this Pinterest marketing tool.
There are three ways to go about it:
- Schedule from your website.
- Upload pins you have designed directly into Tailwind.
- Schedule from Pinterest.
If you decide to go for the #1 and #3 option, the easiest way is to add Tailwind as an extension on your browser.
- Any time you want to schedule a pin, just hit on the Tailwind icon on your browser extension and you can add a lot of pins as you want.
- Next is to select a board that best suits pin. Note: Don’t save a pin to more than 10 boards. It is what Pinterest recommends.
- Check your pin description to be sure that it suits your pin title and keywords on your board.
- Click on Schedule now. That’s all.
- Note that if you didn’t click on schedule, and closed the window, your pin will be on Drafts.
Let’s Recap
Learning how to use Pinterest to drive traffic to your blog is necessary especially as a blogger who needs a large volume of traffic. In this ultimate guide, I discussed with you all the steps which you need to take which are the following:
- Create a Pinterest Business account
- Set a Pinterest board
- Design your pin
- Create a Pinterest pin
- Save to your board
- Scaling your Pinterest traffic
- Automating the process
Implementing the things you learned in this guide will help you drive more traffic to your blog using Pinterest. Don’t forget that you need to be consistent with it to see results.
Further Reading: Checkout this article on blogging tips for beginners.