You have decided to host your site on Bluehost and you now want to learn how to buy Bluehost hosting.
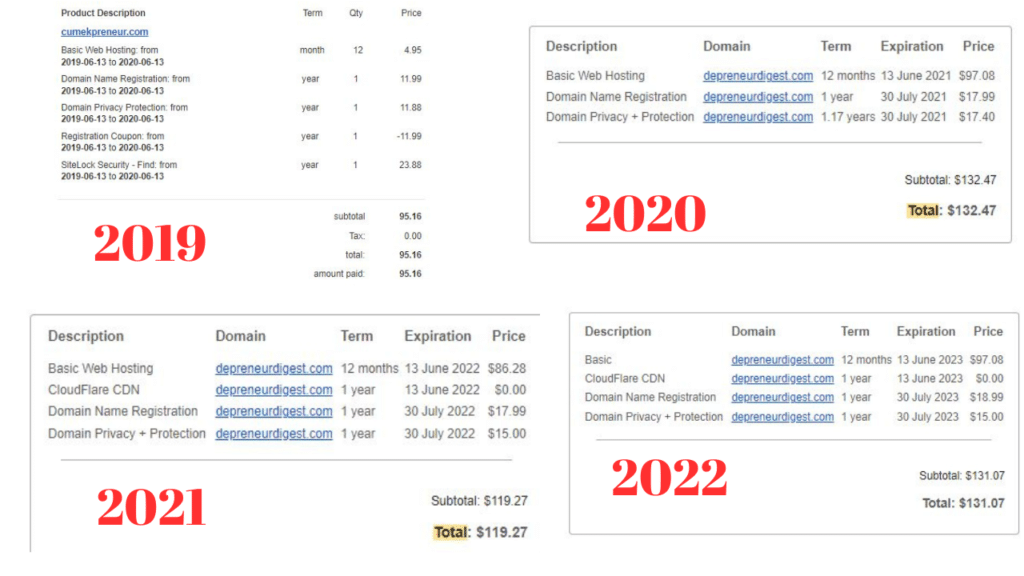
You are in the right place because I have been hosting this blog you are reading on Bluehost since 2019.
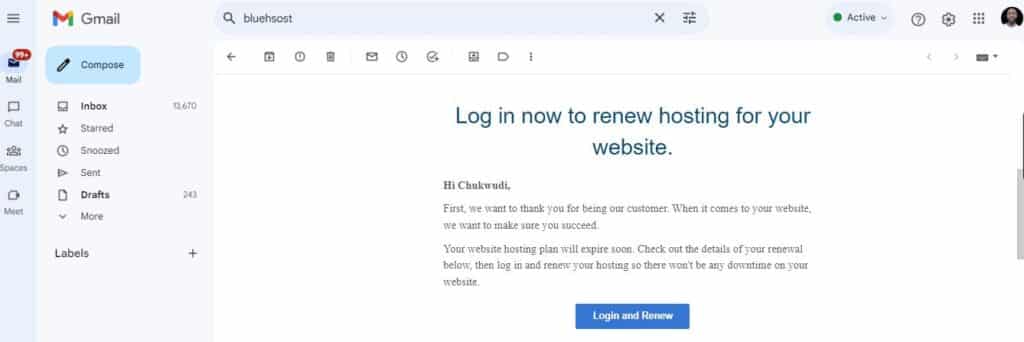
Here is my proof:
In this guide, I will show you how you can buy a domain and host your site on Bluehost in 5 minutes.
Before you buy hosting on Bluehost, you must first have a domain name.
It’s either you already have a domain name or you plan to get it on Bluehost for free ( first year only)
And if you plan to get a domain name on Bluehost, I assume you have a domain name in mind.
Note that it is subject to availability on Bluehost because chances are another site already has it or someone has purchased it and is ready to resell it at a higher price.
So if everything is well understood, let’s take the first step to buy hosting on Bluehost.
Summary of how to buy Bluehost hosting
- Go to Bluehost.com
- Choose a hosting plan and get a 75% discount
- Create or enter your domain
- Select your package Information
- Add package extras ( not all are compulsory)
- Proceed to make payment using a credit card or PayPal
- Bluehost sends an email to confirm your payment
Step 1: Go To Bluehost Homepage
Go to Bluehost.com and choose the type of hosting you want to buy. Bluehost has different types of hosting like VPS hosting, Online Store hosting, Dedicated hosting which I have reviewed, and WordPress hosting which is the commonest and I assume you want to buy as a beginner.
On the homepage, Click “Get Started”. You will see the call-to-action button on the left-hand side of your screen.

This will lead to a page where you can select the hosting plan you want.
For Shared Hosting which is the most affordable and commonest, you have the following:
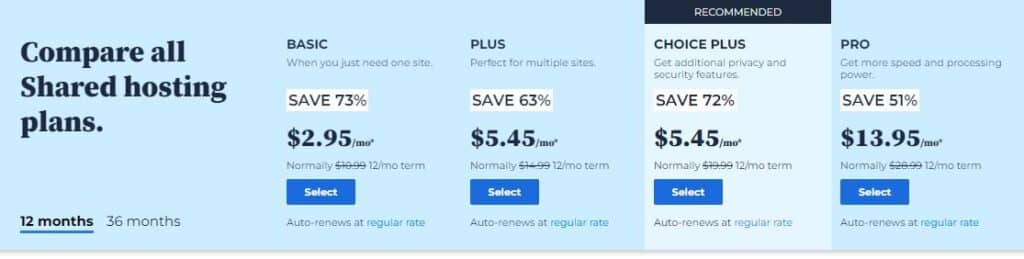
Basic: costs $2.95/month
Choice Plus: costs $5.45/month
Pro: $13.95/month
Read this article where I reviewed Bluehost shared hosting plans.
As a beginner, I assume this is the hosting you would likely buy.
So I select the Basic Plan:
Next, create a new domain or use a domain you already own
Creating a new domain is free since Bluehost offers a free domain for one year.
And you can decide to skip this process by clicking ” I’ll create my domain later.”
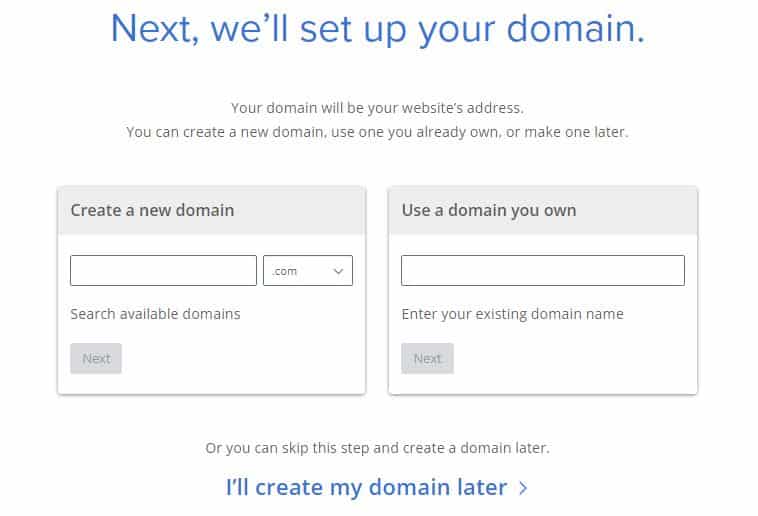
This might be the right approach since you want to learn how you can buy Bluehost hosting.
Step 2: Create Your Account
After creating a domain or entering the domain you have, or skipping to create your domain later, you will be taken to a new page where you create your account.
This is in 3 stages:
Account Information
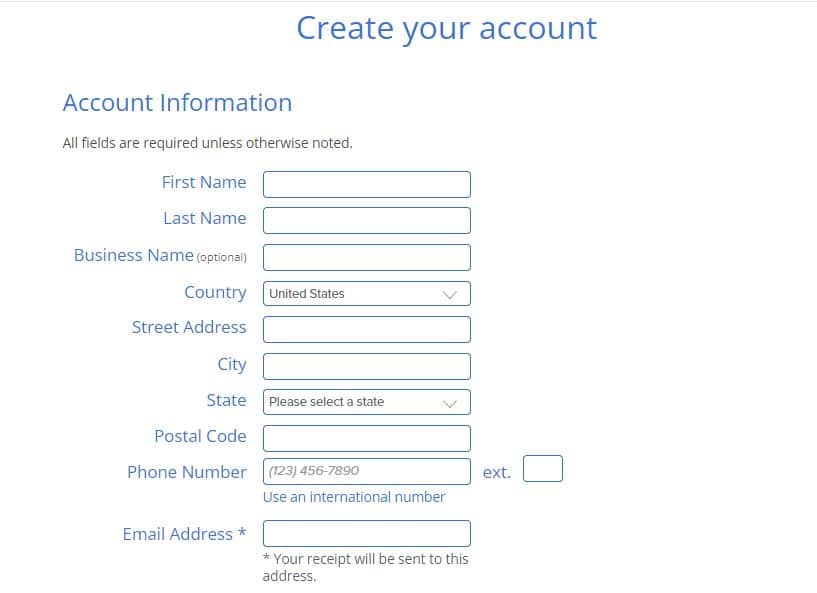
Here, you enter the following:
First and Last Name: Be sure to enter it accurately and let it be the same name on your billing details. This is for Bluehost to confirm that the credit card or PayPal you want to use belongs to you
Business Name: This is optional. If you already have a business and now want to host your business website on Bluehost, you can enter it. Otherwise, leave it open.
Country: Use the drop-down menu to select your country. Bluehost has it set as the United States by default.
Street Address: Enter your street address accurately because it may be required for verification purposes if the need arises
City: Enter your city which is where you currently live
State: There is a drop-down menu from where you select your state. The options you see here depend on your country.
Postal Code: This series of letters and digits you include in your postal address. The aim is to make sorting mail you may receive from Bluehost easier
Phone Number: Enter your active phone number including your country dial code. It’s needed for verification purposes
Email Address: Enter your active and most preferred email address. Bluehost will always communicate with you through it. Also, your payment receipt for the Bluehost web hosting you bought will be sent to you through this email address.
Package Information
The next set of information you provide for your account creation is the package information
It contains the primary details of your Bluehost hosting package.
Going by the basic plan I choose, my account plan is WordPress Basic Hosting.
Service Term: This includes the duration I want to host my site on Bluehost Basic Plan. By default, it’s 12 months @$2.95/month. Click the drop-down arrow to change it.
Hosting Price: After selecting the service term of your choice, Bluehost generates the hosting price which is the actual amount you will pay to buy the hosting for a period of time.
Let’s Encrypt SSL: This service by default is free. You don’t need to select it, and it doesn’t add to your hosting fee.

Package Extras
Here you select extras features you want to include in your Bluehost hosting package. Keep in mind that this will increase your hosting price.
I will explain each of them to you and why you may or not need them:
CodeGuard Basic: Costs $2.99/month
You need this feature to automatically back up your site, revert to the previous version of your site in just a click, and have a copy of your backups stored in secured locations
SSL Single Domain: You need this feature to assure your visitors your site is safe and secured. Bluehost already offers it for free if you are hosting a single site.
Site Lock Essential: You need this to protect your site from malicious attacks from hackers which may compromise sensitive data, lead to blacklisting on search engines, and downtime that will cost you traffic, leads, and sales.
Yoast Premium SEO: You don’t urgently need this. If you’re on a low budget, you can install a free version of Yoast and use it to optimize your WordPress blog post. Once you install WordPress, go to your dashboard and install the free version of Yoast. Then you can upgrade to the premium version when you have the budget.
In the end, you see how much you’ve saved with the discount Bluehost offered you.
And the new total amount you are to pay after adding some package extras to your hosting price.
Step 3: Payment Information
This is the stage where you enter payment information and purchase the hosting and other packages that come with it.
Bluehost supports card and PayPal payments.
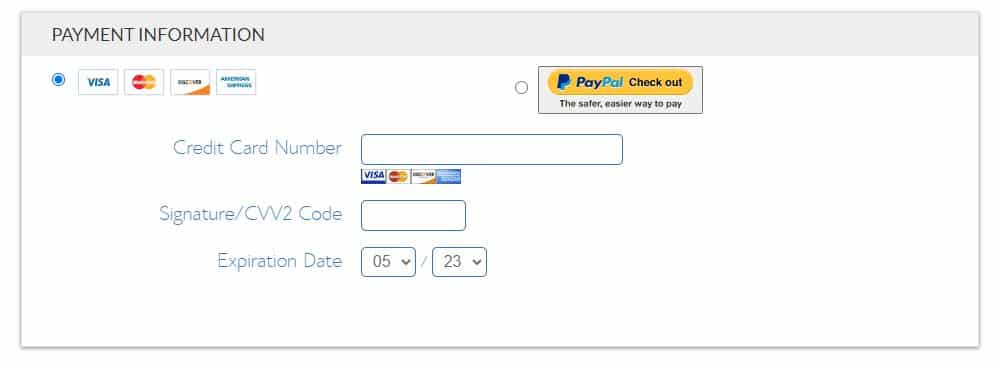
Indicate the payment method you want to use.
If you tick a card, you can use your VISA, Mastercard, American Express, and Discover credit cards to make payments.
You are required to enter the following:
- Credit card number
- CVV2 Code/ Signature
- The expiration date of your card
If you tick PayPal and click the button, you will redirect to the PayPal page where you enter your PayPal email address to proceed with the payment.
If your PayPal account is already saved on your browser, you just enter your password to proceed with the payment.
And if you don’t have a PayPal account but want to create one and use it to pay for your Bluehost hosting, there is an option on the page to create a new account.
Step 4: Payment Confirmation
After buying Bluehost hosting of your choice, a payment confirmation is sent to you via the email address you used to create an account. The payment confirmation contains your billing information, payment details, receipt details, and a breakdown of the payment you made.
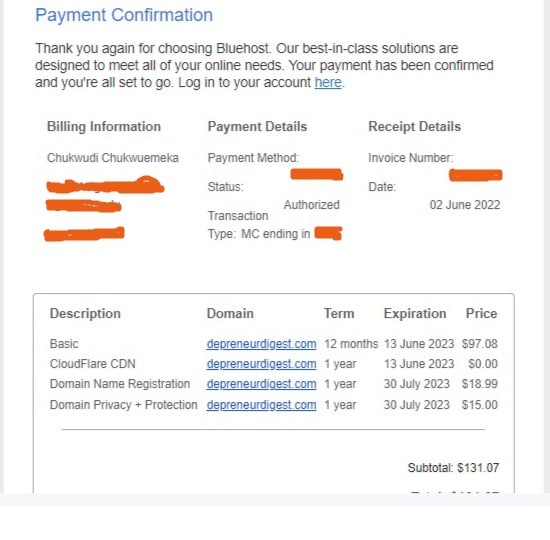
You also see the next time your hosting is due for renewal.
And that’s it with how you can buy hosting on Bluehost.
Following this process, it won’t take more than 5 minutes to have your site hosted on Bluehost.
How To Renew Your Bluehost Hosting
Once your hosting is due for renewal Bluehost informs you ahead. It usually informs you via email 3 weeks before the expiration of your hosting and then follows up 3 days if you haven’t renewed after the first notification.
Renewing your hosting is simple.
Click on the “Login and Renew” button you see in the email it sent you about renewing your hosting. That will take you to your Bluehost dashboard where you can complete the simple steps and pay for your hosting renewal.
You can also log in directly to your Bluehost account, navigate to your dashboard and click on Renew Hosting which pops up as a notification.
Another way is to contact Bluehost representatives using live chat support.
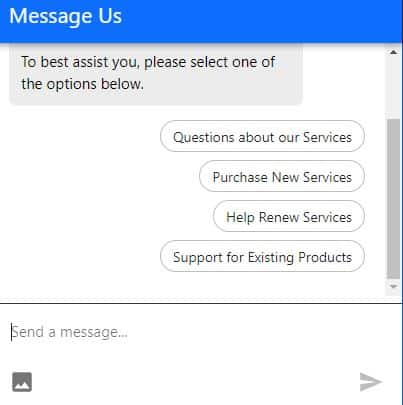
It takes a few minutes, and you’re connected to a representative who can help you renew your hosting. I recommend this process if you want to upgrade your web hosting or add extra packages. It’s also an opportunity for you to ask Bluehost for a discount on hosting.
I have always used this strategy to get discounts when I want to renew my hosting on Bluehost. I ask the representative if they can offer me a discount since I’m a recurring customer and they agree.
The price is now lower than what is available on the pricing plans of Bluehost for hosting renewal.
How To Manage Your Bluehost Purchases
Managing your Bluehost purchase is simple.
Login to your Bluehost dashboard
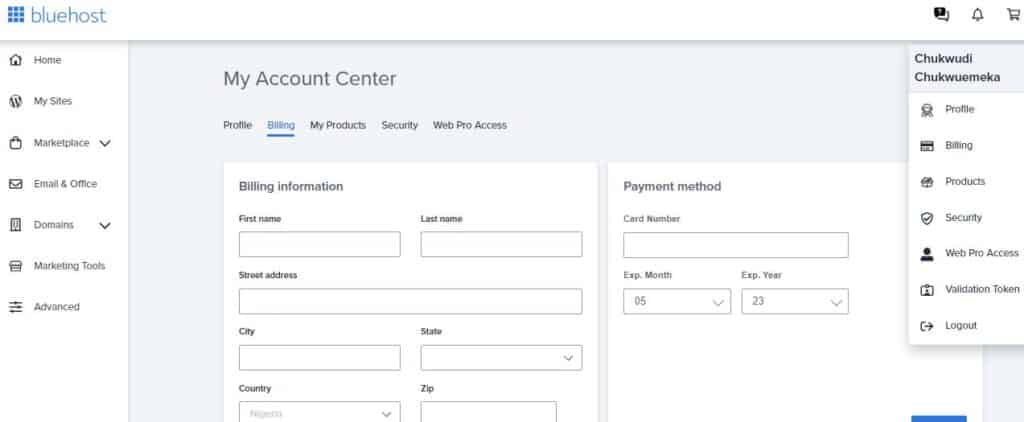
Click on Your Profile and Select Billing
Then Scroll Down
You will see the payment history for all purchases you made on Bluehost.
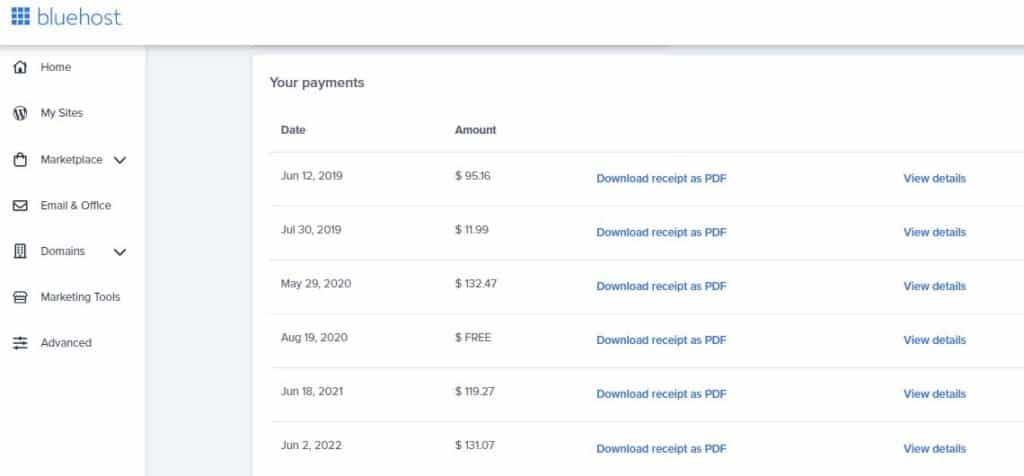
You can download your receipt as PDF or view details of your payment.
When you navigate to My Product Tab, you see all the products and services you bought on Bluehost for the current year:

How much does it cost to host on Bluehost?
With $2.99, you can host your site monthly on Bluehost. This is for the Basic Plan on Shared Hosting Server. However, Bluehost has advanced hosting plans like the Dedicated Server which starts at $109.97 per month.
Do you pay monthly for Bluehost?
Yes, Bluehost has a monthly plan. But it’s cost-effective to do an annual subscription for any plan you choose since you get a discount.
Final Thought On How To Buy Bluehost Hosting
Buying Bluehost hosting is simple. I’ve shown you the steps to follow in this guide. Once you have a domain, choose a hosting plan, create an account, select package information, and package extra of your choice. Proceed to make payment and within a few minutes, Bluehost confirms your payment via email they will send to you.
That’s it! You have successfully bought hosting on Bluehost.